March, 2013

Project 13: Human Retouching

If you know how to use Photoshop, you have power to manipulate reality and trick the viewer.  This power is often used by advertizers.  They “retouch” photos of people to make them look more “beautiful”.  Skin can be smoothed, proportions changed, eyes sparkled, etc.  Here are some examples of photos before and after they were retouched.  Can you see the differences?

Article348238_JessicaAlba_photoshop[1]

celebrities-before-and-after-photoshop-18[1]

faith_sides_lg-(2)[1]

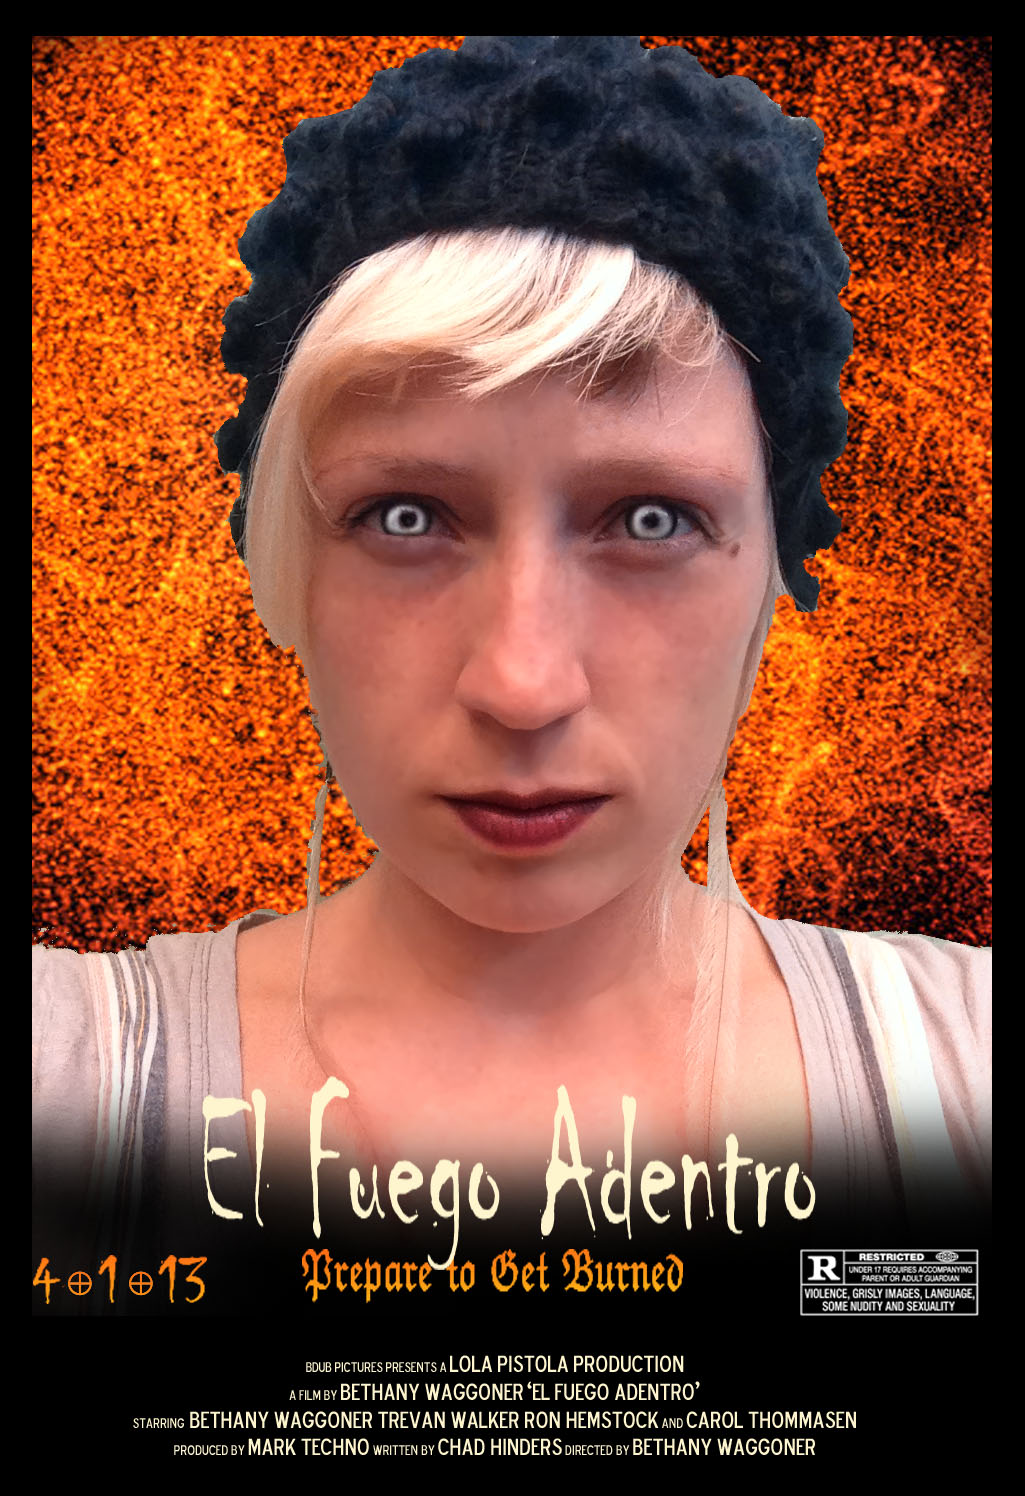
Changing people using Photoshop  is often criticized for giving the public unreal expectations of what they need to look like in order to be beautiful.  In reality, its unatainable because its not real, just computer manipulation.  We are going to make our own retouched piece and you can chose if you want to make a book cover, magazine cover, album cover, movie poster, or advertisement.  Here are some examples:

book

magazine

movie

AD

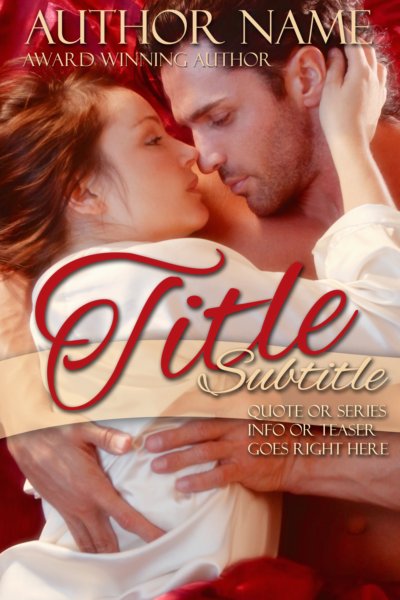
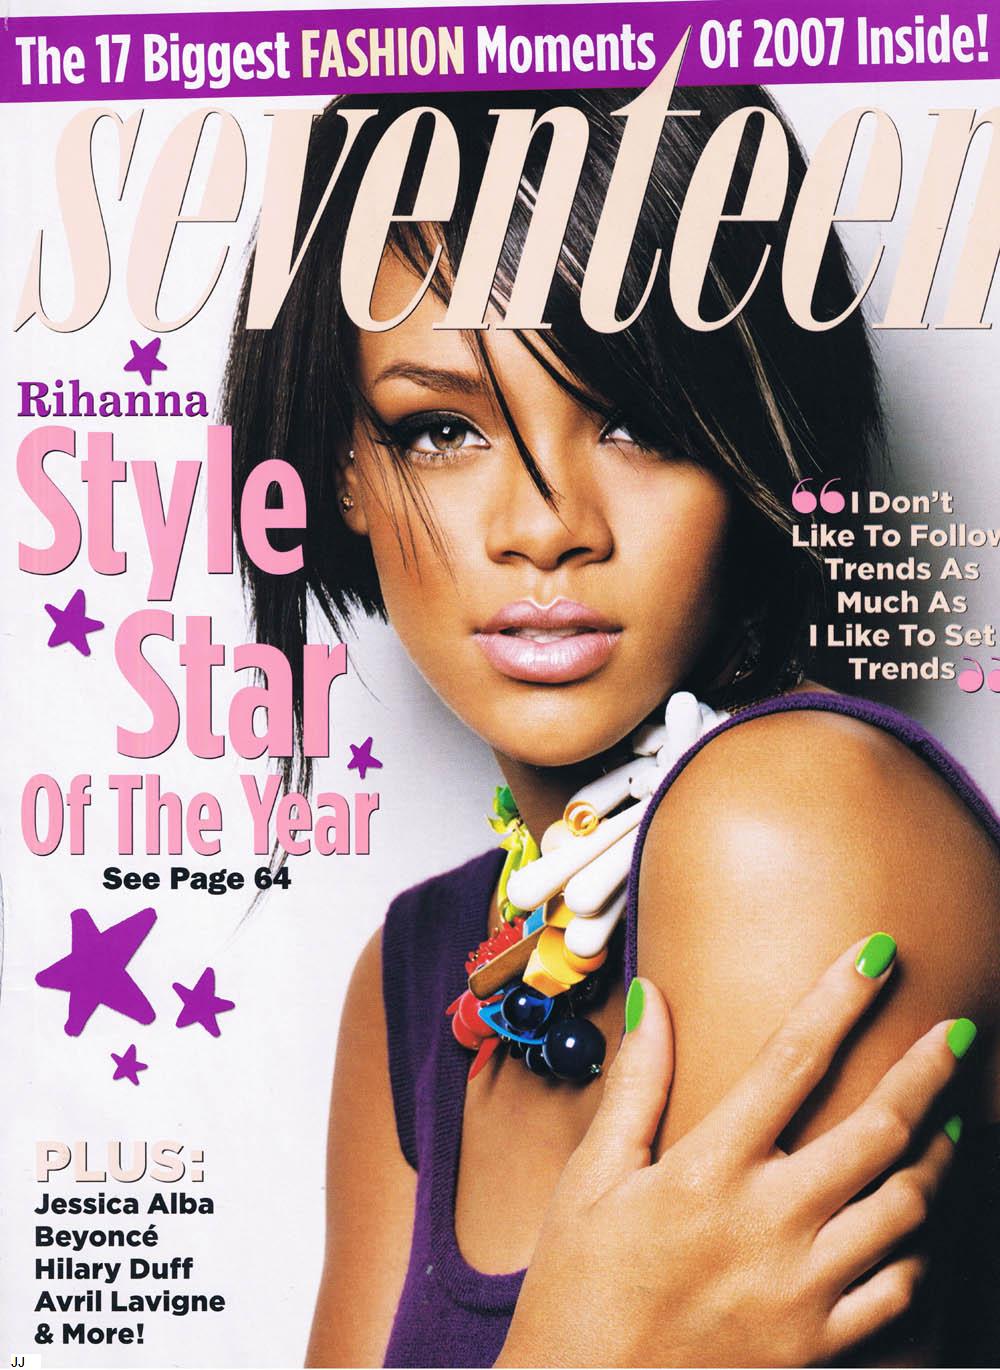
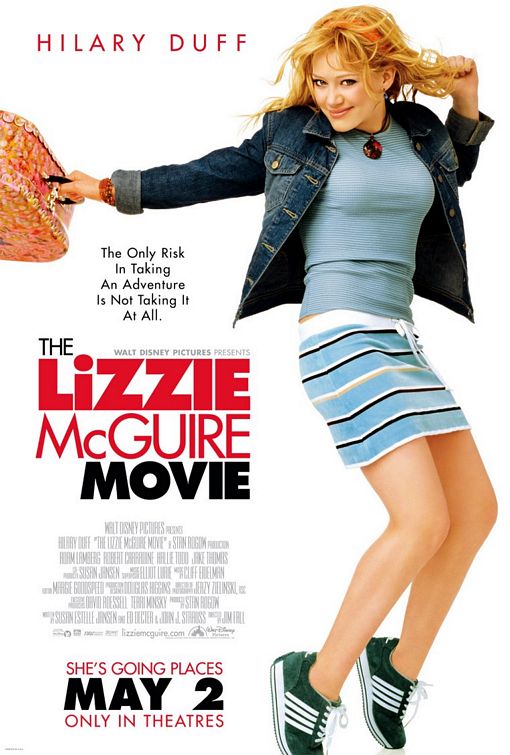
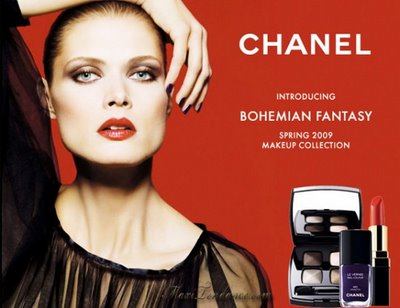
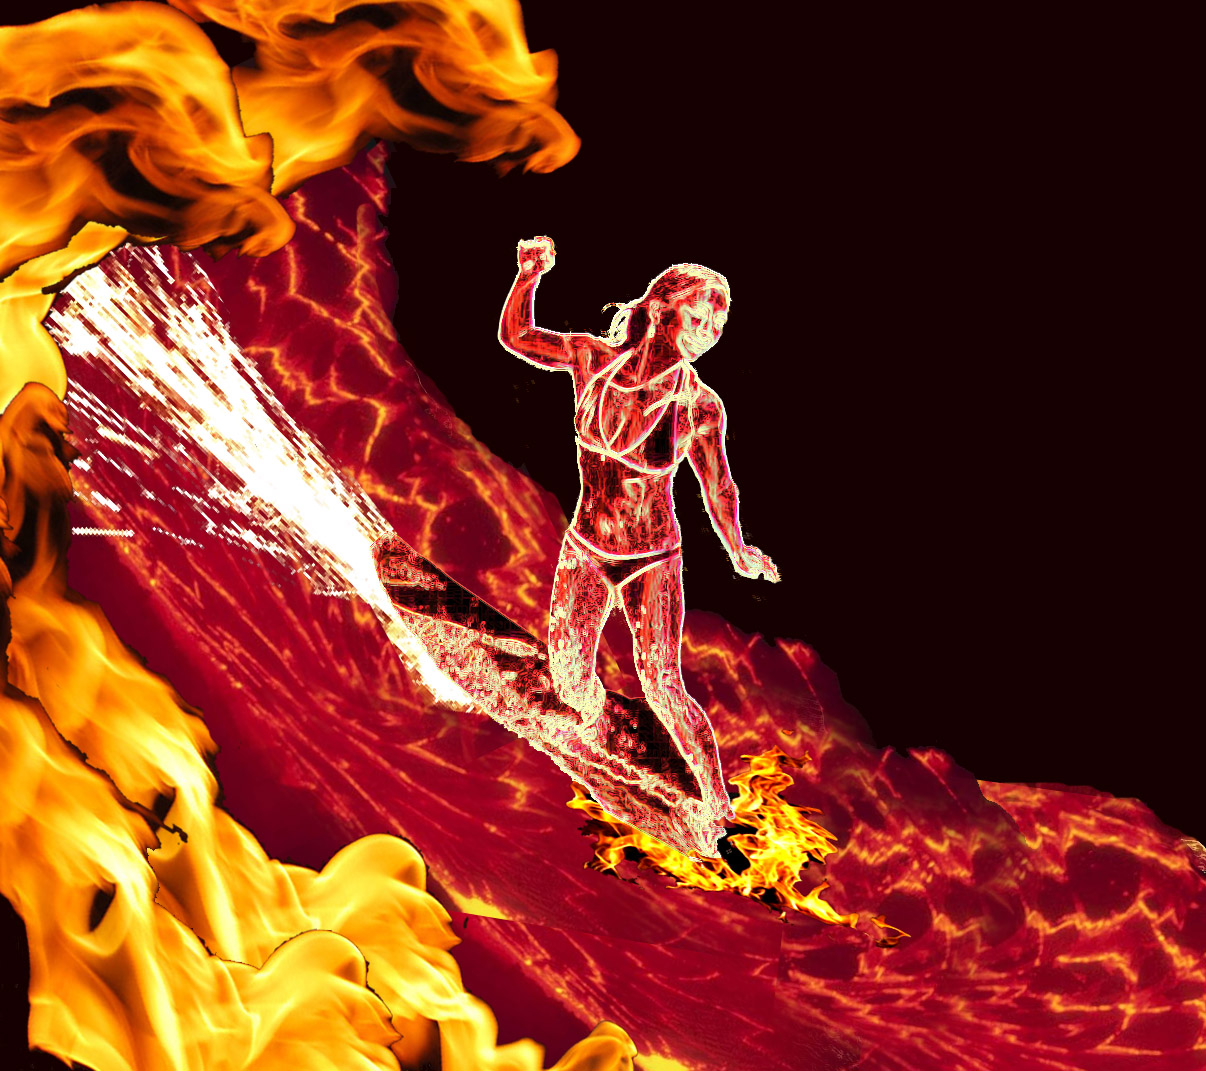
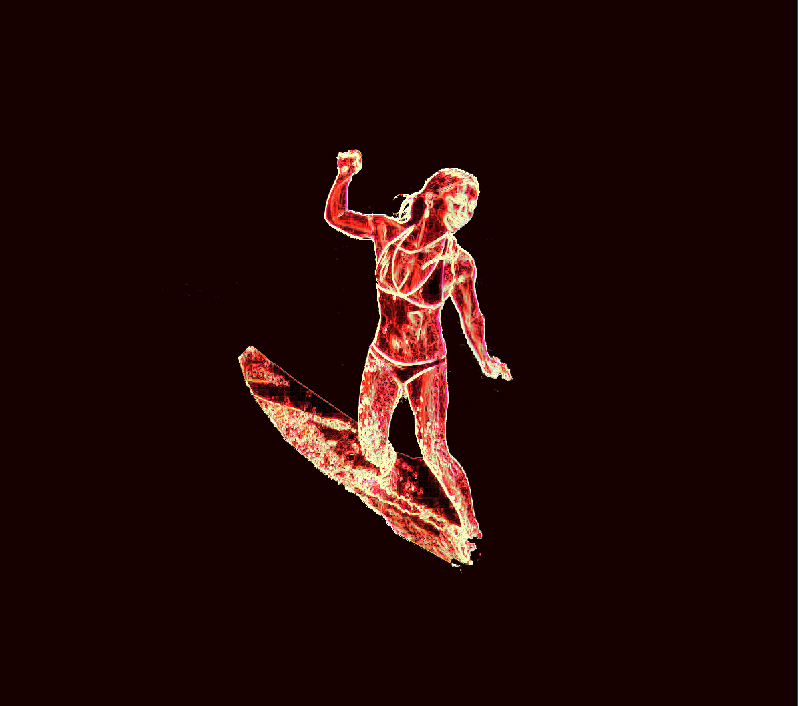
I’m going to make a Movie Poster

retouch

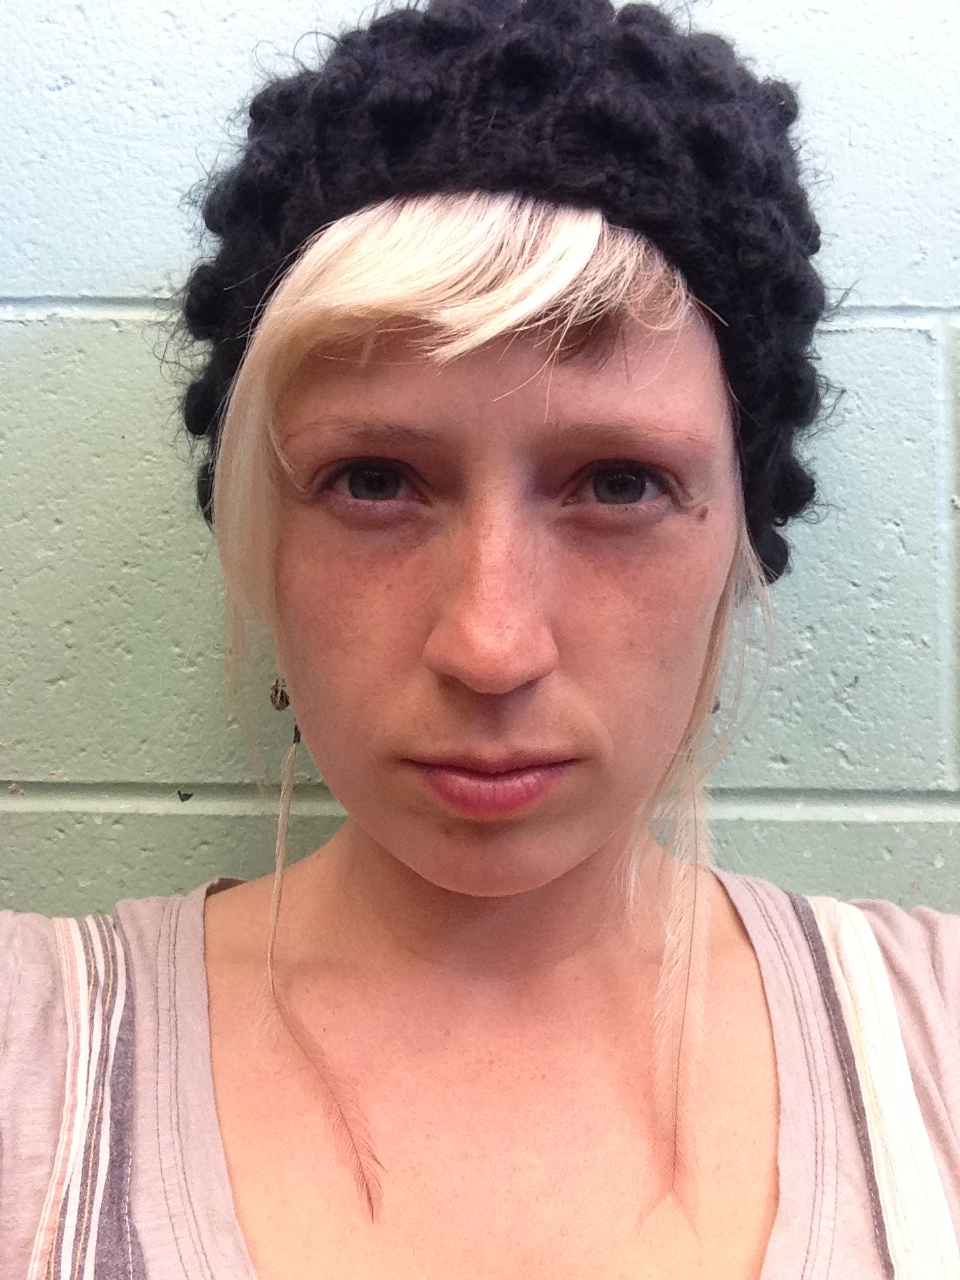
1. Smooth your skin.  Once you have your photo open, Duplicate the background layer and name it skin.  On the skin layer, go to Filter -> Noise -> Median…and enter a value of around 3 pixels. Then go to Filter -> Blur -> Gaussian Blur… and enter 5 pixels.

layer_masks1

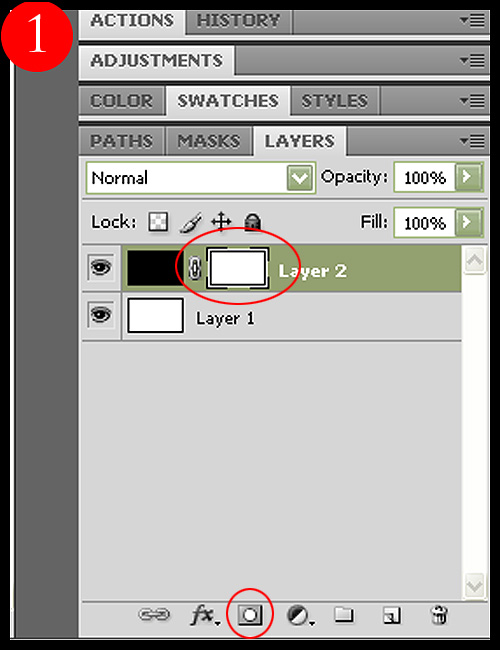
Step 2. Add a layer mask (by pressing the first button on the lower part of the Layers Palette) to the layer you have just blurred and fill it with black. Then pick a soft, medium sized brush and start painting with white on the layer mask. Make sure you avoid any lines on the face; use it only on the skin, to get a smooth, professional effect. Vary the brush size and opacity depending on the area. Avoid blurring the eyes, lips or hair.

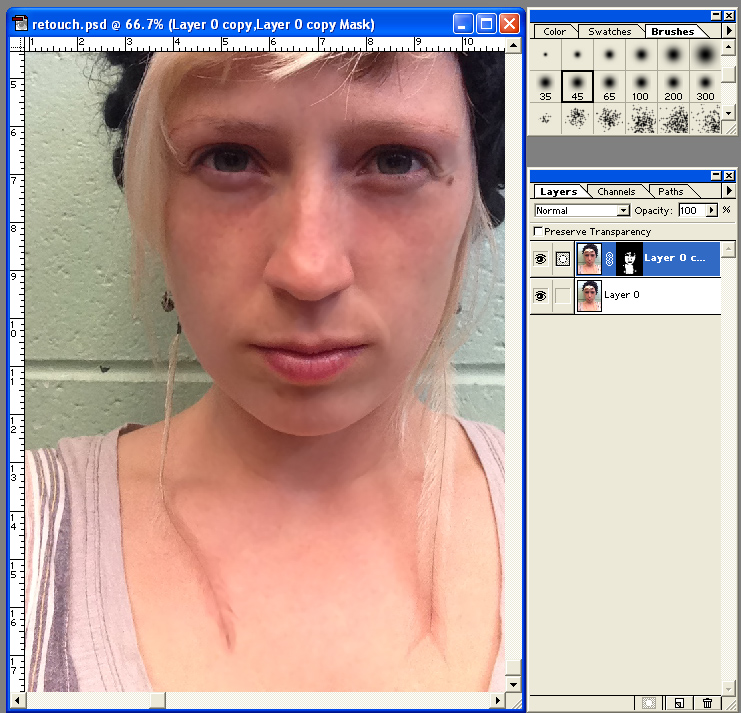
After you finish this step, you should get something like this:
2

Step 3:  Make the eyes pop

Duplicate the background layer and rename it Eye Pop.  Make sure the Eye Pop layer is above the background layer.
Select the dodge tool and lighten the iris.

Stay away for the thin, darker, perimeter of the iris and the pupil.  Use a fuzzy brush.

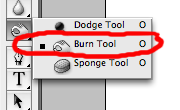
Select the burn tool and darken the perimeter of the iris and the pupil.

  You may also decide to slightly extend the eyelashes by changing your brush size to roughly 5px and running the burn tool along the length of the lashes. I rarely do this, but it can add a more dramatic pop for fashion pics.

eyepop

* Note – I dodged my eyes a lot to make them look scary and glowing.  You don’t have to make your eyes “pop” as much as I did.

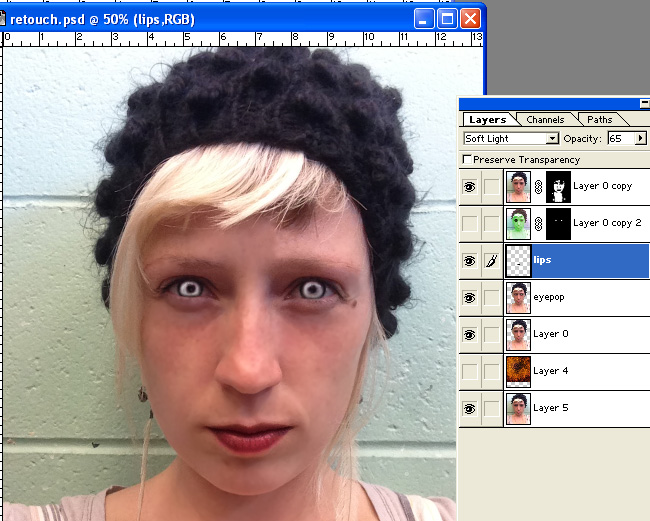
4. Make the Lips more Luscious.  Make a blank layer above the Eye Pop layer and name it lips. Using a brush, paint over your lips as perfectly as you can using black.  You might want to feather the edges so its not an overly crisp line there.  lips

On the layers tool bar where it says Normal change it to Soft Light.  Adjust the opacity of that layer until it looks good to you.

lips2

 5. Put in a background and make the figure match it.  Flatten what you have so far if you are happy with it.  If you want, use the clone tool to smooth out or remove any additional blemishes or loose hairs at this time.  Cut your figure out as neatly as you can!  Use the lasso tools, magnetic wand, eraser.  Remember, selctions can be altered with Shift (+) and Alt (-).  Select a background that makes sense and looks good. Go to Image->Adjust->Channel Mixer and mess with the dails till the colors in your skin seem to look good with the background.

new color

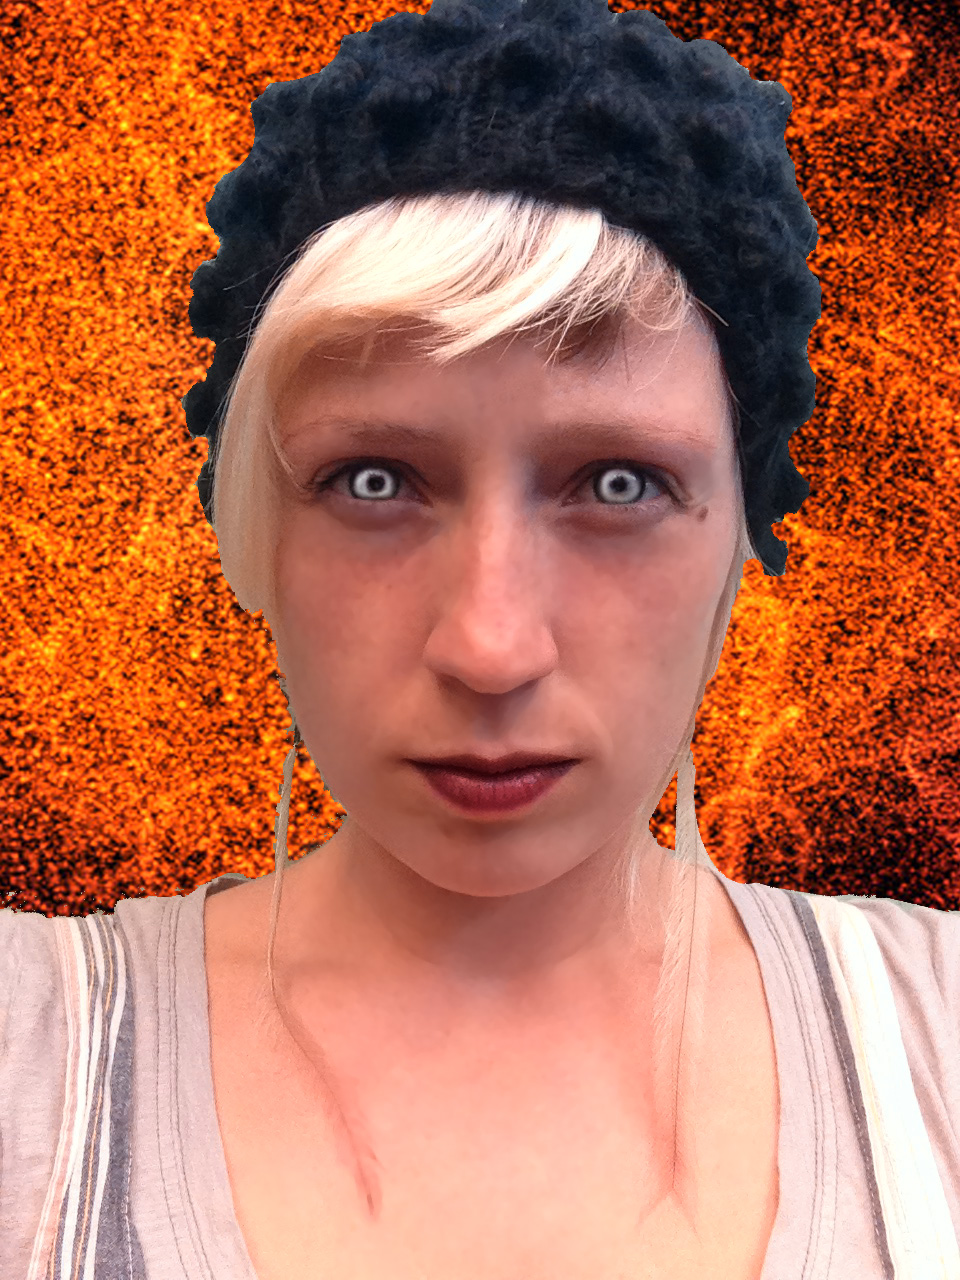
6. Make it look like a real book cover, magazine cover, album cover, movie poster, or advertisement  I added a black frame around mine, then used a mask to have the bottom of my photo fade to black.  Look at the examples above to determine what sort of text should be on your project.  I recommend using Photoshop elements for the text part because it has more options and samples.  Good luck and have fun!

Movie Poster

Project 12: Visual Pun

A pun is a play on words which have a similar sound but different meanings. Now it’s your turn to take a photograph that visually represents a different application of a word or words.  Here are some examples of visual puns:

world peas

Be clever and creative, and as always, do quality, neat work…

If you are stuck, here is a list of possible ideas:

– Watch Dog
– Fan Club
– Second Hand Store
– Strong Box
– Bookworm
– Loud Tie
– Toothpick
– Gatorade
– Handcuffs
– Horse radish
– Fireman
– Wisdom Tooth
– Mail Man
– Boxing Match
– Butterfly
– Moth Ball
– Horse Fly
– Eye Ball
– Football

-Fruit Punch
-Deviled Eggs
-Flower Bulb

-Fire Drill
-Dragon Fly
-Dr. Pepper

-Star Fish
-Serial Killer

Project 11: Flaming Object

For our next project we will make a person or object appear to be on fire and shooting flames or in some sort of fiery environment that makes sense for that object/person.


Here is my surfer girl, riding a lava wave with flame times, shooting sparks!

final

This was the original photo:

original

I got the idea from this online tutorial, which transormed this car:

img1

Step 1: Decide on your object/person and cut it out neatly!

1

Step 2: Duplicate this layer about 3 times. Make it so you can only see the top one.  Name it Outer Glow.

Step 3: Make a black background with a tint of red.

Step 4: On the Outer Glow Layer click Filter->Stylize->Find Edges.  Then type Ctrl I to Invert the layer.  It should look something like this. 

2

Step 5: Duplicate this layer.  Make it so you can only see the top layer, titled Outer Glow.  Name the copy underneath Red Channel.  Click Select->Color Range with a very high tolerance (about 200) and click on the whitish outlines of the image.  Click Select->Inverse and delete evertything but that whitish outline.  Next hold Control and click on the little picture to the left of the layer in the layer window.  All the ouline should be selected.  Make the Foreground color a whitish yellow.  Click Edit-> Fill->Foreground Color.  Your image should look like this:

3

Step 6: Click the eyeball on the Outer Glow layer so you can’t see it and make it so you can see the Red Channel layer.  On the Red Channel layer click Image->Adjust->Channel Mixer.  Make sure the Output Channel says Red.  Slide the tabs of the Red, Green, and Blue Channels all the way to the right so your image looks really red.  Next click on the eyeball of the Outer Glow layer so its on top of the Red Channel Layer.  It should look something like this:

4

Step 7: Create the environment.  At this point, it is your job as a graphic designer to make a fitting scene for your object/person.  I combined these pictures to make my background:

Flame_STOCK_by_stuff_stock

I cut out and then skewed this flame to make curl like the top of the wave.  I also duplicated it 3 times.

lava

I flipped this lava picture and duplicated it, and used the Clone Tool to smooth the seams.

sparks

I used these sparks as a trail behind her.

flames

I warped this flame to put in front of the board.


Please put as much time and thought into your environment too!  Have fun, make something that looks cool!

Project 10: Perspective Scene

Perspective is an approximate representation on a flat surface of an image as it is seen by the eye. Objects appear to grow smaller as they get further away.  Here is an example:

The different parts of one point persepctive:

Horizon Line is the eye level of the observer vertically.

In this graphic, the horizon line is represented in red.

In this illustration, the horizon line is where the blue sky meets the brown street.

Perhaps in the left hand drawing the viewer is sitting on the sidewalk, so the horizon line is low.  In the right hand drawing the viewer is standing on the roof of a building, therefor the horizon line is higher.

 The Vanishing Point is a point at which receding parallel lines seem to meet when represented in linear perspective .

The Vanishing Point rests on the horizon line and it represents where the viewer is situated from left to right.

In the central panel of this illustration of a railroad, the viewer is to the left of the tracks, therefore the vanishing point is on the left side of the horizon line.

 An interior scene also has a horizon line and vanishing point.  Can you find them in this drawing?

Your assignment is to create an interior scene which follows linear perspective.

Your scene must have:

A floor

A ceiling

walls

at least one object on each wall which follows perspective

(window, book case, door…)

at least one figure, standing, jumping, or floating which looks convincing in the scene.

Have fun!

Here is my example:

Begin with a grid or a photo that you can use as a guide for your perspective lines and wall shapes.  I used this one:

Here is how I made a hardwood floor follow perspective.

1. I found a picture that already had some perspective lines and added it as a new layer onto my grid

2. Using the polygonal lasso tool , isolate the corners of the hard wood floor.

3. Delete both corners

4. Line up the top of the floor with the bottom of the back wall

5. Using Edit–>Transform–>Perspective or Edit–>Transform–>Skew to make the floor fit perfectly.

6. Repeat this process or a similar one for the walls, ceiling, and objects along these planes.