Assignment Six: The Magic Wand and Paint Bucket tools

Save and then Open this snowman in Photoshop.

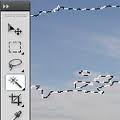
1. Double click the layer which says Background and rename it Snowman.  Click the Magic Wand tool on the background of the snowman.  Erase it.  Find a new photo to put in the background.  Copy and Paste it into the Snowman document.  Make sure it in the back layer!

2. Using the Paint Bucket Tool  color the Snowman’s hat and scarf to match his new background.  Use at least three different colors.

Flatten the image under Layer–> Flatten Image.  Save it as a jpeg and post it to your blog under the title Assignment Six.

Write about your experience with the Magic Wand and  Tools.  What do they do? What could you use them for?

Assignment Five: Lasso Tools

1. Download this picture. Select the stork using the Regular Lasso tool.  Hit the Delete key to erase the stork.  Flatten the image under Layer–> Flatten Image.  Save the image as a jpeg.

2. Download this picture. Use the Polygon Lasso tool to select the house.  Go to Selection>Inverse Selection to select everything but the house.  Apply a Filter. Flatten the image under Layer–> Flatten Image.  Save the image as a jpeg.

3. Open a photo of your choice.  Use the Magnetic Lasso tool to select part of it, then change it with an Adjustment or a Filter. Flatten the image under Layer–> Flatten Image.  Save the image as a jpeg.

Post all three photos under Assignment Five.  Write about your experience using the Lasso Tools.  Were they easy to use or difficult?  Which seemed to have the most capabilities?

Assignment Four: Rectangular and Elliptical Marquee Tools

Open a jpeg picture of your choice in Photoshop.

  1. Make a Rectangular Marquee selection.  Click Select –> Inverse.  Change this selection under Image –> Adjust.
  2. Make an Elliptical Marquee selection, Change this selection under Image –> Adjust.

Flatten the image under Layer–> Flatten Image.  Save the image as a jpeg and post it to your blog under the title Assignment Four.

Write about your experience with the Rectangular and Elliptical Marquee Tools. What possibility do you see with these tools?

Assignment Three: Maneuvering different Layers

1. Download the file Layer_Practice.psd. Open Layer_Practice.psd. in Photoshop. Change the order of the layers on the document so you can see all the features of the South Park character.  Find a jpeg photo from the internet to use as a background for her.  Copy and paste it into the Photoshop document.  If it isn’t the right size, adjust it under Edit –>Transform–>Scale.  Make sure the background is the bottom layerFlatten the image under Layer–> Flatten Image.  Save the image as a jpeg and post it to your blog under the title Assignment Three.

2. Write about your experience maneuvering Layers in Photoshop.

Assignment 2: Using the Move Tool

1. Download the file move_practice.psd. Open the file in Photoshop.  Use the Move tool to assemble these pieces into the South Park character.  Once you have assembled the character, flatten the image under Layer–> Flatten Image.  Save the image as a jpeg and post it to your blog under the title Assignment Two.

2. Write about your experience using the Move Tool in Photoshop.

Assignment 1: Adjusting Your Photo

For the first assignment, you will adjust a photo in six ways.

You will begin by choosing a jpeg image and saving it to My Pictures.

You will then open it in Photoshop under File –> Open.

Under Image –> Adjust adjust the following:

Brightness/Contrast:

Hue/Saturation:

Desaturate:

Gradient Map:

Invert:

Threshold:

Save each version of your photo separately under a folder entitled Assignment 1.

Create a post on your blog to showcase and label your original photo, as well as each adjusted version.  Title it Assignment One: Adjusting Your Photo.  Include an introduction where you describe your first experience with Photoshop What did you do? Was it easy or difficult?  Which adjustment did you like the best? Remember to use correct English grammar and punctuation.

« Previous Page